Help Center
  • 👋Welcome to the Dokin help center
  • Overview
    • 💡What we do
    • ✨Our Features
    • 🛣️Changelog & Roadmap
  • 🏁Get started
    • 📲Install Dokin
      • 🏨Install Dokin as a Google Workspace Admin
    • 🛫Launch the Dokin App
  • 📦Integrations
    • 1️⃣Introduction
    • Airtable
      • 🖇️Connecting Airtable Data using Dokin
      • 🗃️Mail Merge with Airtable Data
    • HubSpot
      • 🖇️Connecting HubSpot Data using Dokin
      • 🔀Push Back Data from Google Sheets to HubSpot
      • 🗃️Mail Merge with HubSpot Data
    • Salesforce
      • 🖇️Connecting Salesforce Data using Dokin
      • 🔀Push Back Data from Google Sheets to Salesforce
      • 🗃️Mail Merge with Salesforce Data
    • Retable
      • 🖇️Connecting Retable Data using Dokin
      • 🔀Push Back Data from Google Sheets to Retable
      • 🗃️Mail Merge with Retable Data
    • Notion
      • 🖇️Connecting Notion Data using Dokin
      • 🗃️Mail Merge with Notion Data
    • Trello
      • 🖇️Connecting Trello Data using Dokin
      • 🔀Push Back Data from Google Sheets to Trello
      • 🗃️Mail Merge with Trello Data
    • PostgreSQL
      • 🖇️Connecting PostgreSQL Data using Dokin
      • 🗃️Mail Merge with PostgreSQL Data
    • Google Analytics 4
      • 🖇️Connecting Google Analytics data using Dokin
    • Google Search Console
      • 🖇️Connecting Google Search Console (GSC) data using Dokin
    • Facebook Ads
      • 🖇️Connecting Facebook Ads data using Dokin
    • Snapchat Ads
      • 🖇️Connecting Snapchat Ads data using Dokin
  • TROUBLESHOOTING
    • ⚠️Error: Multiple Accounts Issue
    • ❓Some sheets linked to my Slides or Docs are marked as “Private”
    • 💲I’ve subscribed a paying plan but my account still appears as Free
  • 🎚️Settings
    • 💵Billing
      • Subscribe to a Plan
      • LTD Deals
    • 🔐Data & Privacy
      • 💾Data storage
      • 🆔Google Permissions
  • Use Cases
    • 🤝For Sales & Operations
    • 📊For Finance & Business Analysts
    • 📣For Marketers
Powered by GitBook
On this page
  • Step 1: Select the Google Analytics connector
  • Step 2: Connect to your Google Analytics Account
  • Step 3: Select the Data to Import from Google Analytics
  • 1. Select a Table
  • 2. Select the Fields
  • 3. Optional: Filtering and Sorting
  • 4. Optional: Customize your Import
  • 🎉 Congratulations, your Google Analytics data is connected. Now, what's next ?
  1. Integrations
  2. Google Analytics 4

Connecting Google Analytics data using Dokin

This step-by-step guide will walk you through the process of connecting Google Analytics to Google Sheets, Slides or Docs using the Dokin add-on.

PreviousGoogle Analytics 4NextGoogle Search Console

Last updated 1 year ago

Dokin is a powerful Google Workspace add-on that allows you to connect various data sources and integrate them seamlessly into your spreadsheets, documents or presentation. With Dokin, you can sync Google Analytics data to:

  • Manage and analyze your website data in a Google Sheets spreadsheet,

  • Create dynamic dashboards and visualize real-time data

  • Automate reporting

Get started with one of our Free, Pre-Built Google Analytics dashboards:

Preliminary : how to install and open Dokin add-on ?

Install Dokin add-on

If you haven't already, you need to install the Dokin add-on for Google Workspace. To do this, follow these steps. You can refer to to know how to install Dokin.

Open Dokin add-on

After successfully installing Dokin:

  • For Google Sheets: create a or open an .

  • For Google Slides: create a or open an .

  • For Google Docs: create a or open an .

Then, click on “Extensions”, “Dokin” and then “Start”.
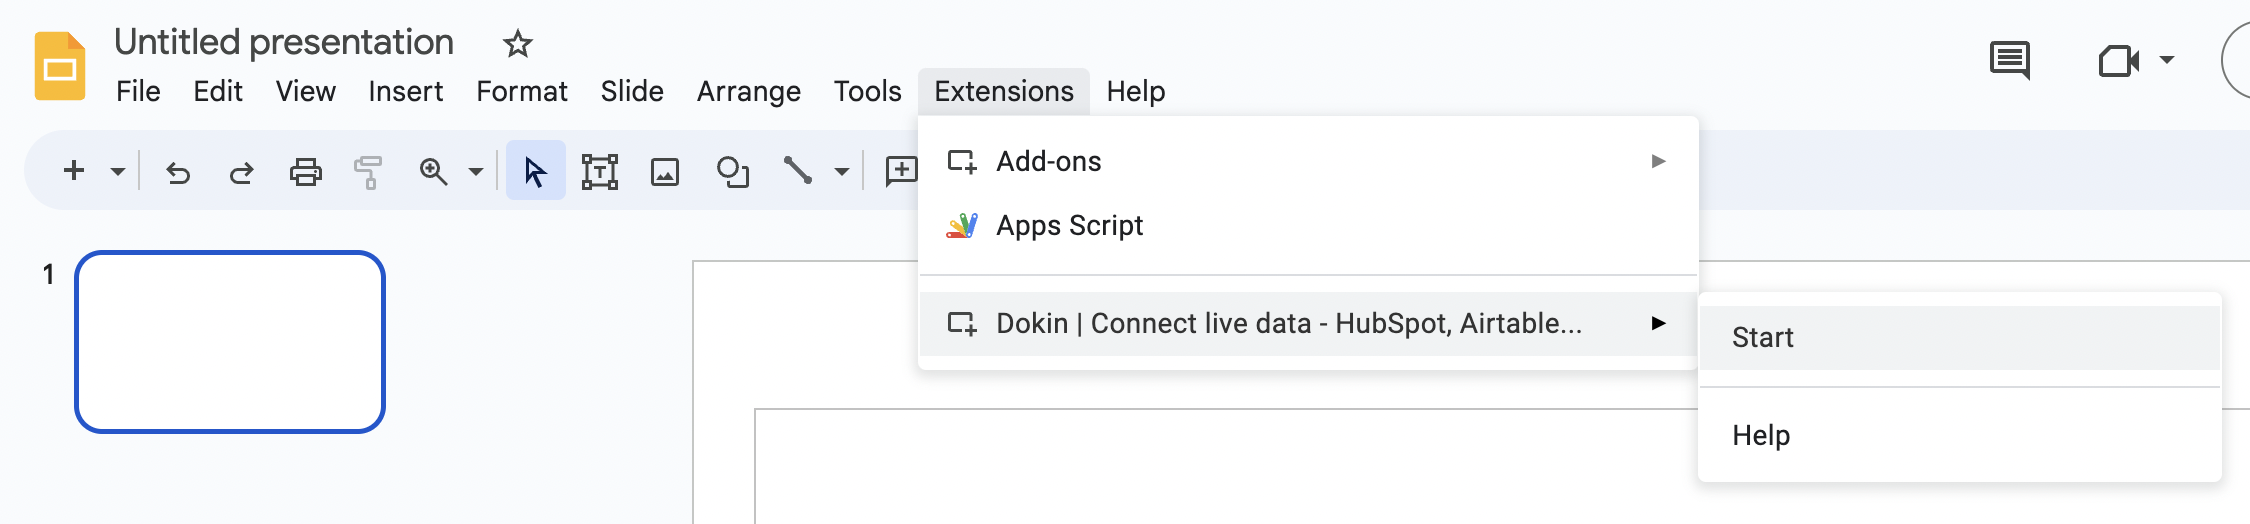
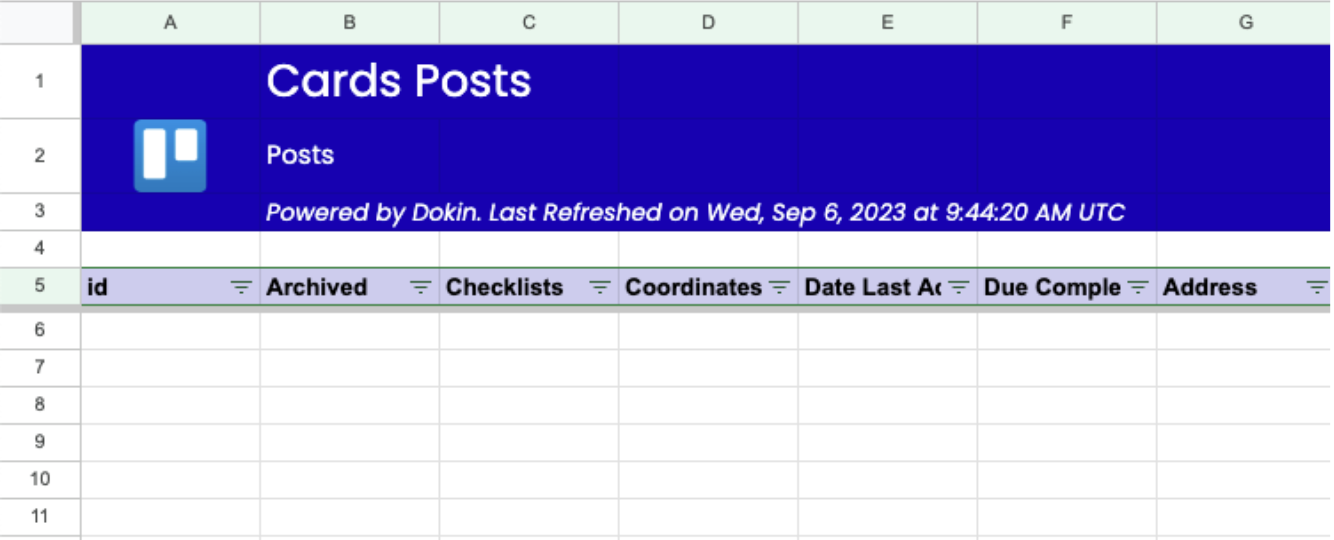
Step 1: Select the Google Analytics connector

On the home page, you'll find a list of your imported data, as well as a button for creating new connections. Click on the "Connect New Data" button.

Next, a menu will appear. Here, simply pick the "Google Analytics" app from the list of options.

Importing data from Scratch or from a Template

When it comes to importing data, you have two options: starting from scratch or using a template you've created before. Templates can significantly speed up the data import process. To discover how to create and reuse templates, please consult our step-by-step article.

Step 2: Connect to your Google Analytics Account

If this is your first time using Dokin or if your previous connection has expired or been revoked, you will need to connect Dokin to your Google Analytics account.

You will be re-directed to a Google Authentication page. Simply select the account linked to your GA4 account.

Once you are done, the page will automatically close and you'll be redirected to Dokin

Step 3: Select the Data to Import from Google Analytics

A preview page will open. This allows you to manage your import, by selecting properties, dimensions, filters and more. It also allows you to preview the data you import.

1. Select a Table

Begin by selecting the GA4 account and table from which you intend to import data. This choice determines the source of the information you wish to bring into Dokin.

2. Select the Fields

Next, pick the Dimensions and metrics you wish to display in your import. You have the flexibility to select anywhere from one to an unlimited number of fields, tailoring the import to your precise needs.

Once you've made your selections, you can rearrange the fields to your liking. This can be achieved with a simple drag-and-drop action, ensuring that the data is presented in the most logical and useful order for your specific needs.

You will have an inline preview of your data:

3. Optional: Filtering and Sorting

For additional customization, you can apply filters and sorting to your imported data. This step is optional.

Filtering

  • Select the field you want to filter by

  • Choose an operator (such as Equal, Contains, Less Than, etc.). The operator depends on the type of field.

  • If needed, enter the value.

Sorting

If you want your data to be presented in a specific order, select the sorting field and indicate whether it should be in ascending or descending order.

4. Optional: Customize your Import

4.1 - Assign a Name to your Import

Choose a meaningful name for your import process. This name will help you easily identify and manage your imported data within Dokin.

4.2 - Set Up Scheduled Refresh

This option will automatically refresh your data at specific intervals. You can choose the frequency, including the day and time, and configure notifications to receive alerts when data is refreshed.

Google Sheets

An automatic refresh means that at your specified intervals, the information imported into your Google Sheets will be automatically updated. This ensures that your data remains accurate and reflects the latest changes.

Google Slides and Google Docs

An automatic refresh means that at your specified intervals, the information inserted into your Google Slides or Google Docs will be refreshed. This dynamic updating ensures that your presentations and documents always reflect the most current data, saving you the hassle of manual updates.

Frequency

Specify how often you want Dokin to automatically refresh your imported data. This ensures that your data remains current without requiring manual updates.

The frequencies are available:

  • No Refresh (default)

  • Weekly: Data refreshes every week. Select a specific day of the week and time for data refresh.

  • Daily: Data refreshes every day. Choose the time for daily data updates.

  • Hourly: Data refreshes every hour.

  • 15 mins: Data refreshes every 15 minutes.

Notifications

You can opt to receive notifications each time your data is refreshed. The available notification options include:

  • None: No notifications will be sent.

  • Slack: You will receive a Slack message whenever your data is refreshed. If it's your first time selecting this option, you'll be prompted to connect to your Slack workspace.

  • Email: You will receive an email notification each time your data is refreshed.

4.3 - Additional Customization [GOOGLE SHEETS ONLY]

Remove Dokin Header

By checking this box, you can hide the header banner displaying the app name and connection information on your sheet. Instead, the fields will be inserted directly on the first line of your sheet, providing a cleaner and more customized presentation of your data.

Below is an overview of the data with header.

Below is an overview of the data without header.

🎉 Congratulations, your Google Analytics data is connected. Now, what's next ?

📦
🖇️
💰 Google Analytics e-commerce dashboard
📊 Google Analytics e-commerce comparator
📈 Google Analytics website metrics tracker
this tutorial
new Spreadsheet
existing Spreadsheet
new Presentation
existing Presentation
new Document
existing Document
Click on "Connect new Data" and select the Google Analytics Connector
Enter a Name for your Import
You can define an auto refresh for your data, with notifications
Cover

Google Slides

When clicking on Connect, Dokin will display a new Connection on the home page.

Cover

Google Docs

When clicking on Connect, Dokin will display a new Connection on the home page.

Cover

Google Sheets

When clicking on Connect, Dokin will create a spreadsheet importing all the information you've requested.

If you have chosen automatic data refreshes your spreadsheet will automatically refresh with the latest data based on your schedule. You can also update data at any given point by clicking on the refresh button next to your import.

From there, you can choose to insert each cell data as dynamic content or you can create

From there, you can choose to insert each cell data as dynamic content or you can create

multiple presentations using mail merge.
multiple documents using mail merge.
video tutorial